Discover the Fastest, Lightweight, and Highly Customizable WordPress Theme

What Is a WordPress plugin?
A plugin is a code or script that you can add to a WordPress website. Plugins are used to extend the functionality of a website. Each plugin is often known for one or more feature, such as having a website builder.
The WordPress Plugin Directory has more than 60,000 plugins available for free download. These plugins can be created by anyone. You can also create your own plugin but you will need knowledge of HTML, CSS, JavaScript and PHP. Because of the large amount of plugins, almost anything is possible with WordPress, because there is a plugin for everything. With plugins you can create membership sites, integrate Google Maps, secure your website and much more.
Besides the plugins you can find on the official WordPress website, you can also download plugins from other places, such as Codecanyon. Codecanyon is the largest marketplace for scripts, code and WordPress plugins & themes.
Premium plugins, such as Elementor Pro and Codecanyon’s plugins, are not available for download through WordPress’s plugin directory. After all, this directory only contains free plugins. Premium plugins download from the website where you bought the plugin, then upload the plugin to your WordPress website.
Method 1: Install a Plugin From the Plugin Directory
The simplest and most common way to install a plugin is to install it directly from the plugin directory. Here you can find tens of thousands of plugins that you can install for free. If you want to install premium versions of plugins you can do so through the other two methods in this guide.
1. Navigate to the add new plugin page
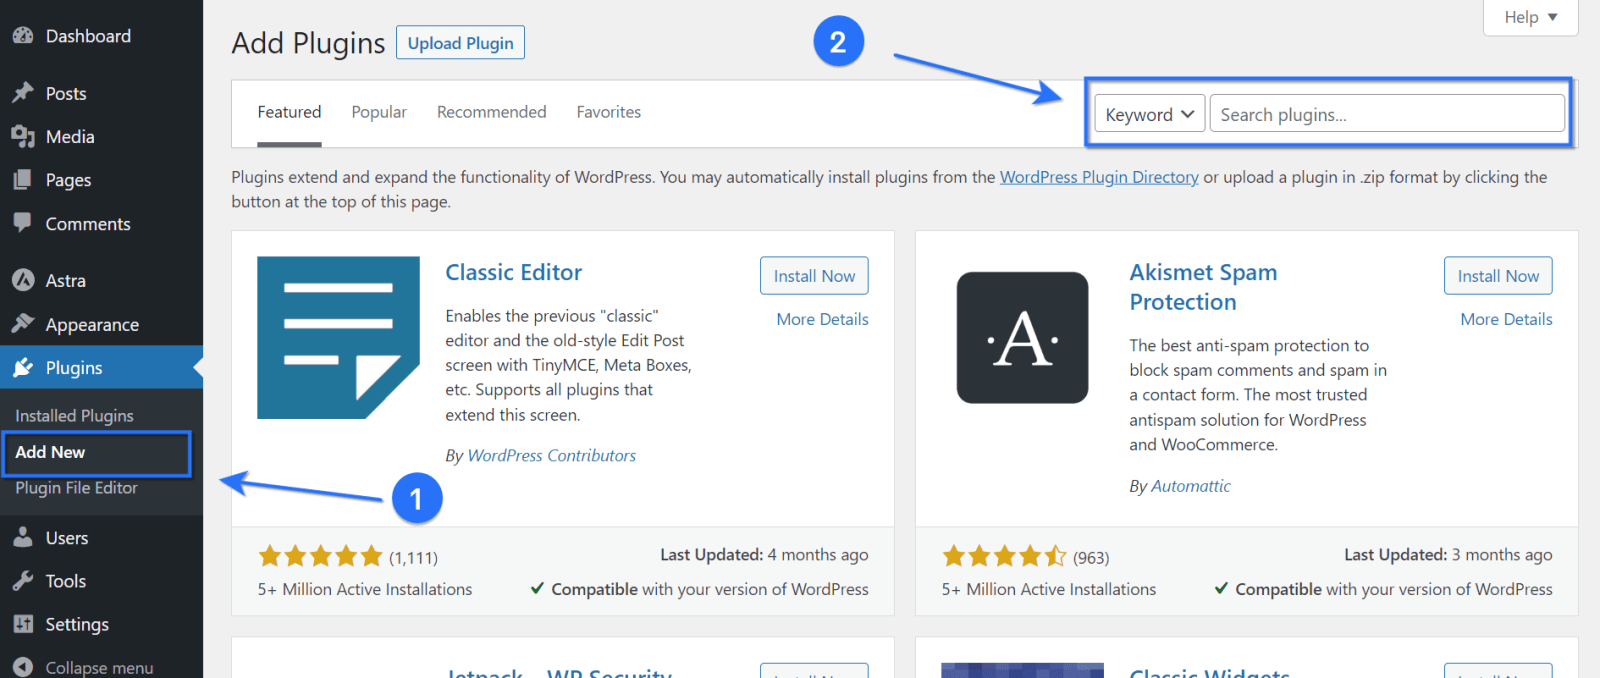
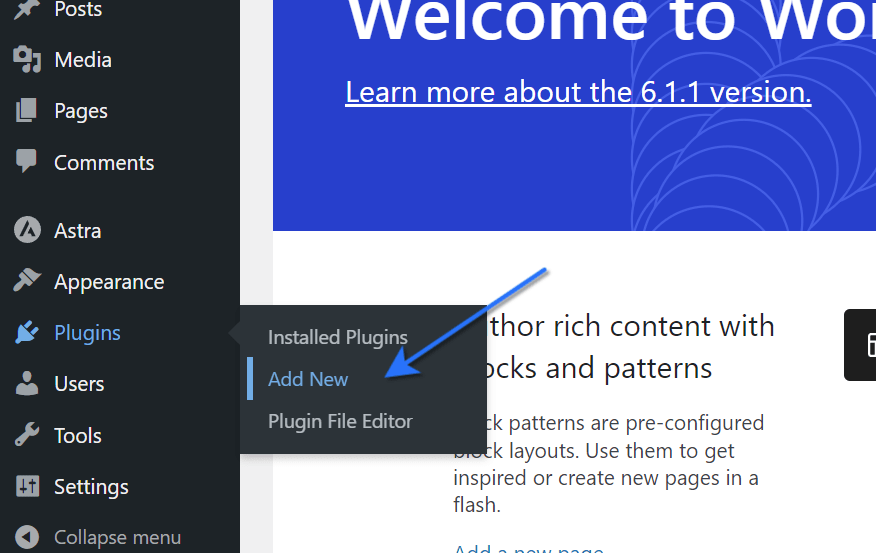
First you need to go to the page where you can add new plugins. You do this by going to Plugins > Add New from the menu on the left.
From this page you can search for new plugins. You can filter by featured, popularity, recommended and favorites. Use the search bar to find the plugin you want to install.
2. Install the plugin
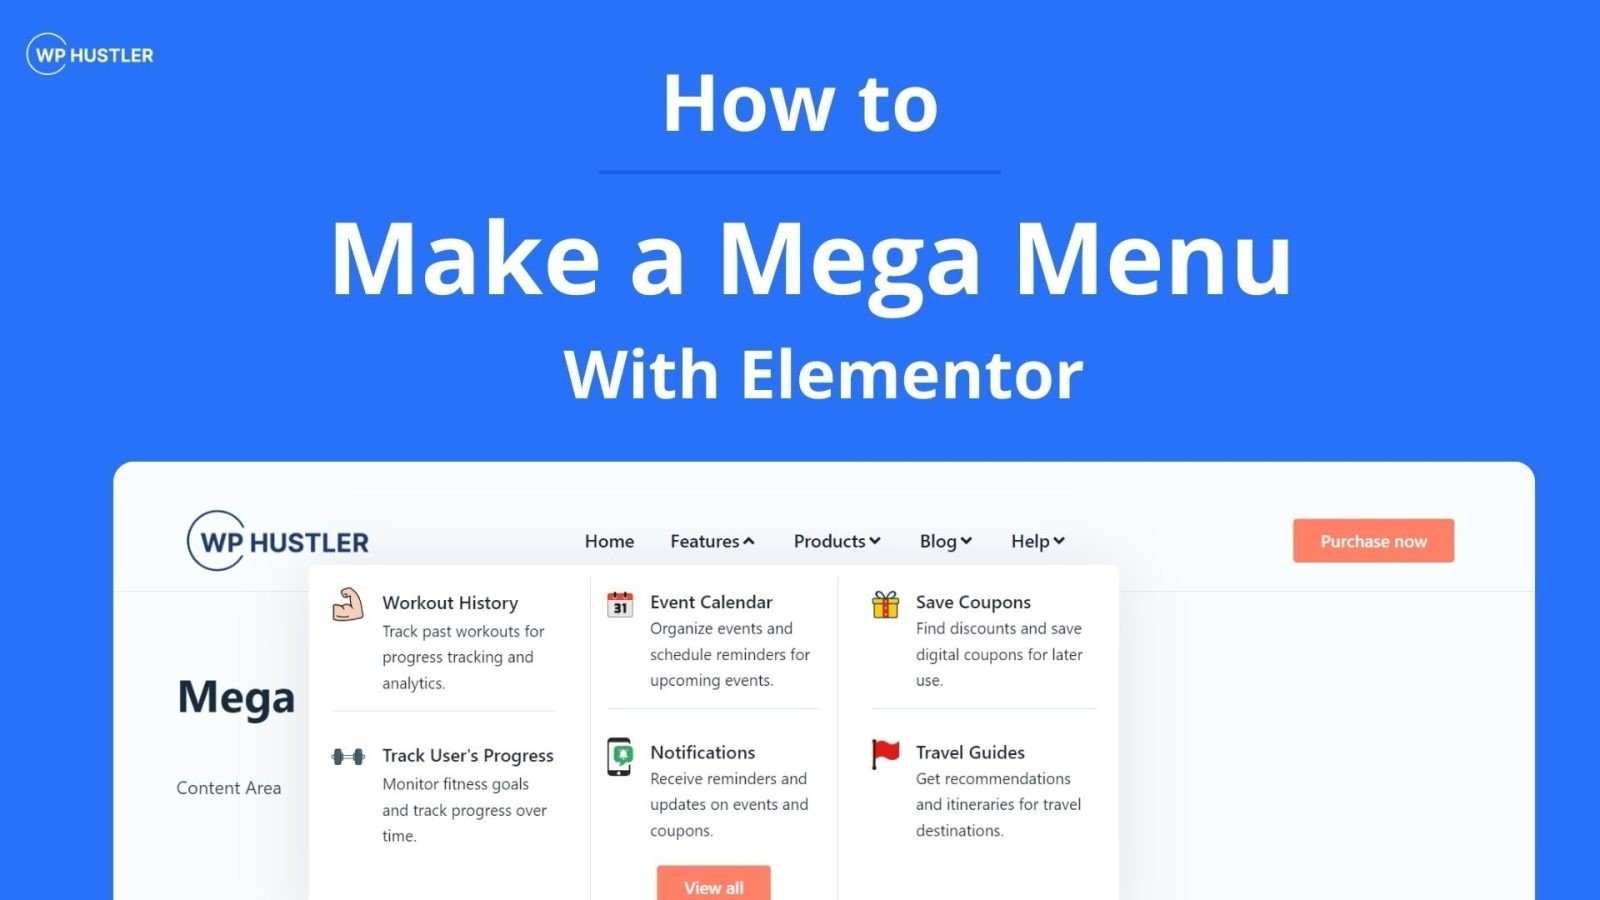
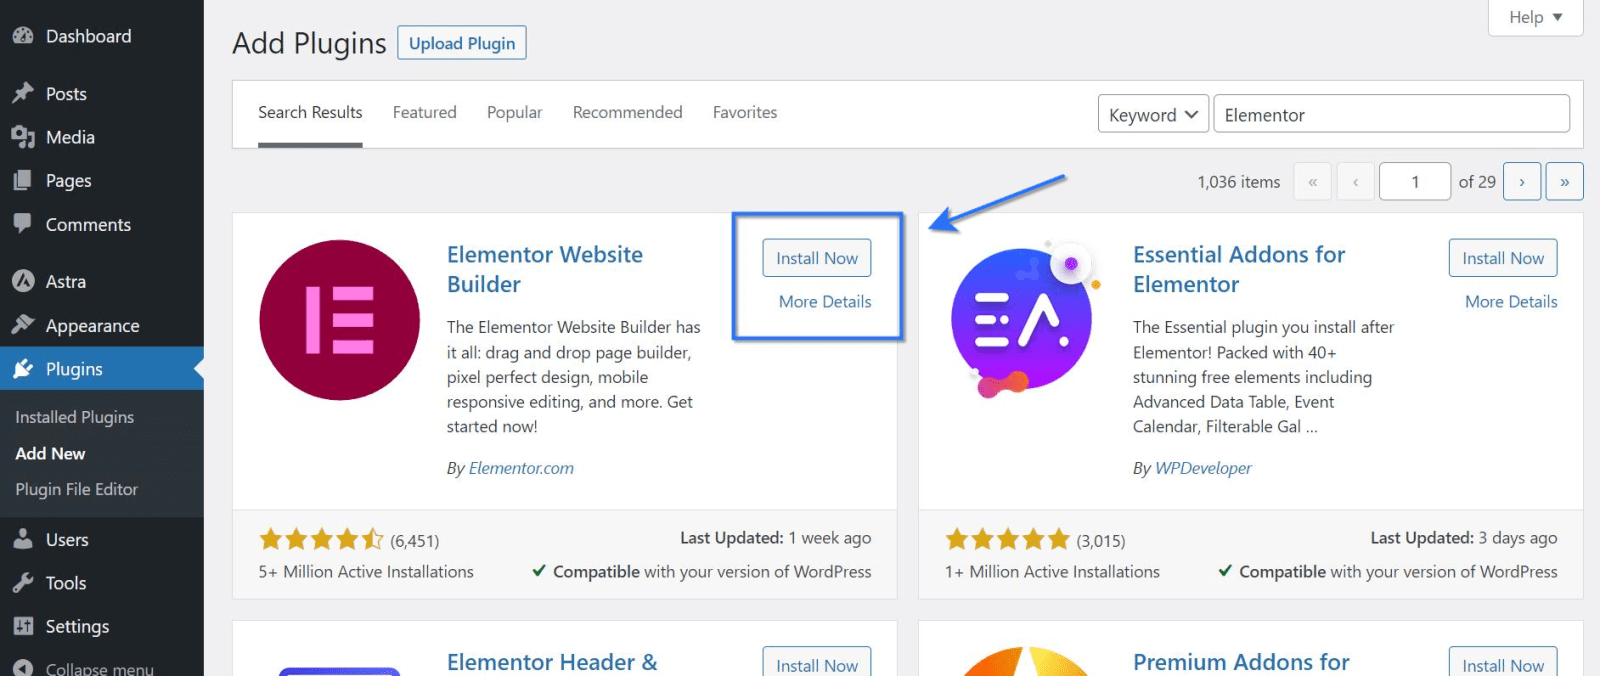
After searching for a plugin you will see a screen like in the screenshot below. In the example, I am looking for Elementor which is the best website builder for WordPress.
If you want to know more about the plugin you can click on More Details. You will then see information such as description, FAQs, changelog, screenshots and more.
To install the plugin click the Install button. Pressing this button will start the installation process, this may take a few seconds.
3. Activate the plugin
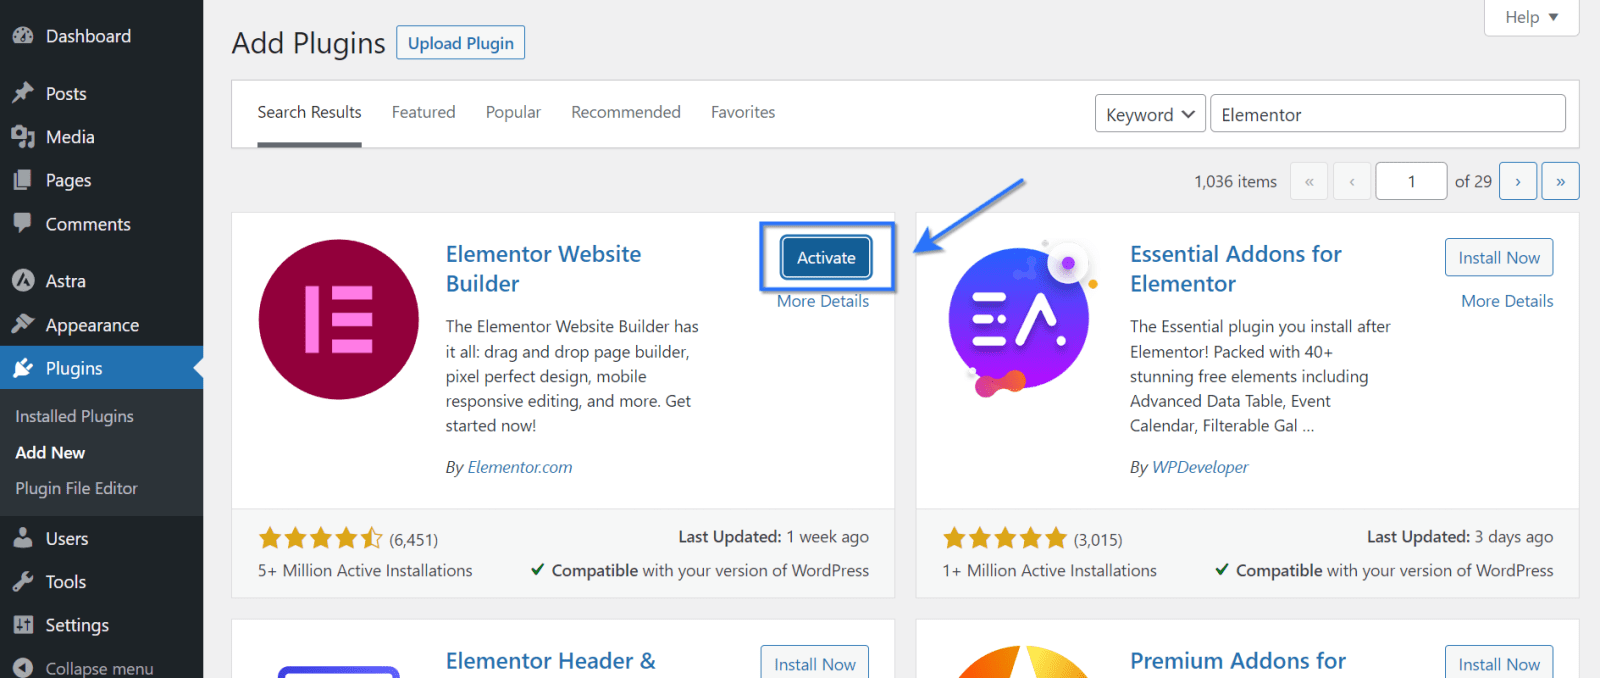
After installing the plugin another blue button will appear. This is the Activate button with which you activate the plugin.
Both WordPress plugins and themes can be installed on your website but not active. The plugin will not work until you activate it. So click the button to activate it.
That’s it, you have successfully installed a WordPress plugin through the plugin directory.
Method 2: Install a Plugin Manually by Uploading a File.
If you have purchased a plugin, you cannot install it through WordPress’ plugin directory. You then have to upload it manually, but don’t worry that’s very easy.
1. Download the .zip file
Make sure you have the plugin downloaded and on your computer. The file you need to download is a .zip file.
2. Navigate to the add new plugin page
To upload a plugin you must first go to the plugins page. Hover over Plugins in the left menu and click Add New.
3. Upload & install the .zip file
On this page you can add new plugins to your website. At the top left, you will see a small gray Upload File button. When you click this button, a section appears where you can upload your file.
Click Choose File to select your .zip file. Then click Install Now to begin the installation process.

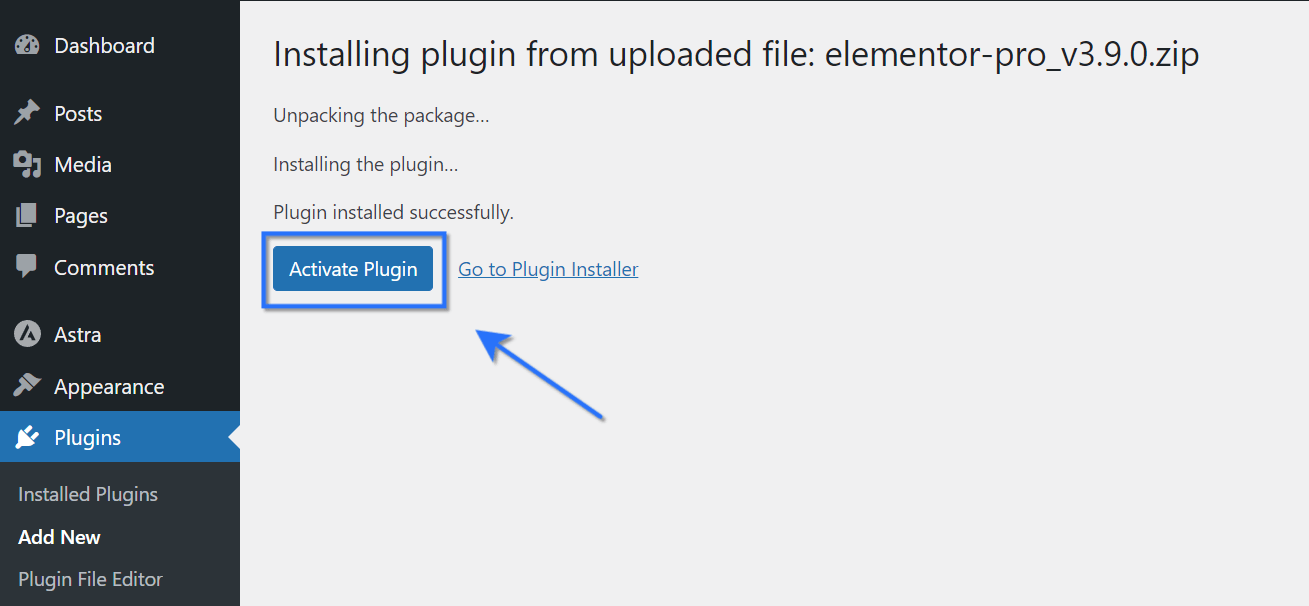
4. Activate the plugin
When the plugin is installed, it is not yet active. A plugin only works when it is active, so click the Activate Plugin button to make sure the plugin becomes active.
Congratulations! You now know how to manually install a plugin by uploading a file.
Method 3: Install a Plugin by Using an FTP Client
The final method for installing a plugin is by using an FTP client. FTP stands for File Transfer Protocol and allows files to be exchanged between computers. For this method, you need an FTP client such as FileZilla. FileZilla is an open-source FTP program for Windows, Mac and Linux.
1. Download the .zip file & extract it
Make sure you have downloaded the .zip file containing the plugin onto your computer. When installing a plugin via FTP, you do not upload the .zip file, but the folder inside the .zip file. Therefore, extract the file to a folder you can easily find. The folder that will be created will have the same name as the .zip file.
2. Connect to your website through FTP
Now open FileZilla (or another FTP client) and connect to your website. If you don’t know where to find the login information for your FTP account, contact your hosting provider.
Enter the host, username, password and possibly the port. Then click Quickconnect to connect to your website. When you see a success message you know you can proceed to the next step.

3. Upload the file to your website’s server
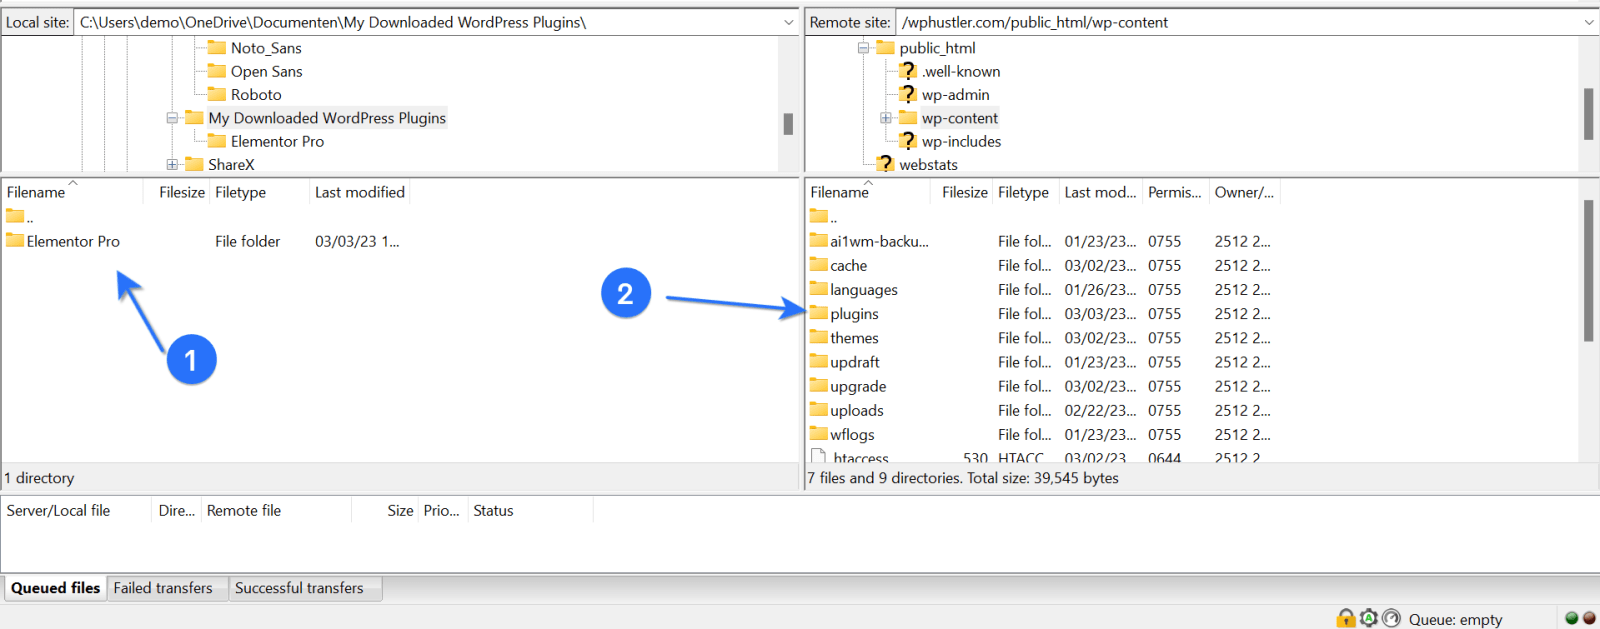
After connecting to your website you can upload files. With FilaZilla you see on the left side the files on your computer, on the right side the files of your website.
Plugins are always located in the plugins folder. To find this folder you have to go on the right side to public_html > wp-content > plugins. On the left side find the folder that contains the WordPress plugin files.
Once you have found both folders drag the folder of the WordPress plugin to the right side in the plugins folder. When all the file have been successfully transferred you can close FileZilla.
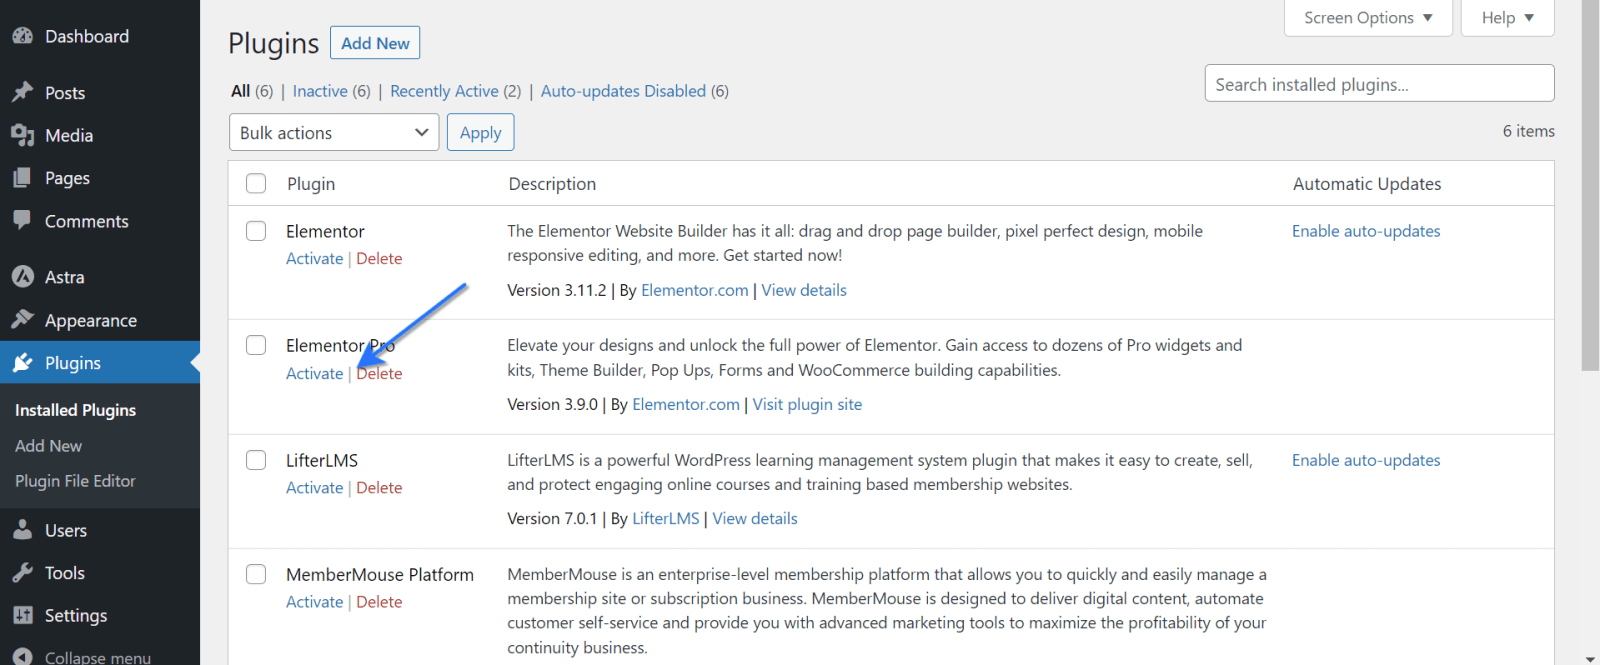
4. Activate the plugin
The plugin files are now present on the website, but the plugin is not yet active. To activate the plugin, go to the plugins page from the left menu in the WordPress admin dashboard.
Find the plugin you just uploaded and click Activate.
That was all! You learned how to install a plugin for a WordPress website in three different ways. I hope this guide was useful for you. If you thought so too, don’t hesitate to share the guide. Spread the knowledge!